Most individuals remember the day they learned to change a tire. After removing the lug nuts and swapping the flat with the spare, everyone was told the same thing when bolting up the new tire, ‘Tighten the bolts in a star pattern.’ No one knew why or how it worked, but somehow, it became ingrained in everyone’s minds as the proper way to bolt up many forms of flanges. This bolting pattern goes back to the early 1900s and became standard practice around 1938 when Taylor Forge began standardizing its flanges. This is now known as the bolting sequence the ‘Star Pattern,’ which can be referenced in PCC-1.
The Star Pattern is the most widely known and used bolting sequence in the industry, but unknown to some, there are alternative flange assembly methods that work just as well, if not better, depending on the application. This article will examine alternative flange assembly methods to better understand how to use them effectively.
For those who are unaware, the ‘Star Pattern’ referenced in PCC-1 Appendix F-6.1.1, requires tightening the bolts in a cross-shaped pattern while increasing the torque value by roughly 30% on each pass. Once the final targeted torque has been reached, additional circle passes are conducted until no additional nut rotation occurs (a minimum of two passes typically achieves the desired result). Some precautions must be considered before choosing an alternative method, which is laid out in PCC-1 Appendix F. PCC-1, Appendix F includes the following considerations: localized over-compression of the gasket, uneven tightening resulting in flange distortion, nonuniform application of the gasket seating load, excessive load/unload of the gasket during assembly, and the possibility of nonparallel flanges.
Alternative Flange Assembly Methods
Modified Star Pattern
The first alternative method listed in PCC-1 Appendix F-6.1.1.2.2 is the ‘Modified Star Pattern.’ This method is best described as the Star Pattern on overdrive. While using the same star-shaped pattern, this alternative method reduces the number of studs that must be tightened before increasing the target torque. Compared to the standard Star Pattern, this method reduces the time and effort used in bolting up a flange. This pattern only requires the first four bolts to be torqued to 20-30% of the final target torque value. Then, the next four bolts’ target torque is increased to 50-70% of the final target torque value. Finally, all subsequent bolts are tightened to 100% of the final target torque value until all pattern passes are complete. As with all patterns in PCC-1, circle passes are conducted until no nut rotation occurs. This method might be used if one is trying to maintain the ‘Star Pattern’ while conserving time.
Quadrant Pattern
The second alternative method listed in PCC-1, Appendix F-6.1.2 is the ‘Quadrant Pattern’. The application of this pattern is much like the Modified Star Pattern in how torque is applied in increments after every four bolts; it differs in the way or sequence in which it is done.Two sequences accomplish this method of bolting: Option 1 – Cross Sequence, listed in PCC-1 Appendix F-6.1.2.1.1, and Option 2 – Circular Sequence, listed in PCC-1 Appendix F-6.1.2.1.2. Both allow for the time efficiency of the ‘Modified Star Pattern’ but bring a simplicity that the other patterns do not. These sequences are easier to follow and do not require numbering each bolt on the flange. The ‘Cross Sequence starts much like the ‘Modified Star Pattern’ but moves to the neighboring, or next loose bolt, after each sequence, making it much easier to keep track of the position while tightening the bolts. The only difference between the Cross Sequence and Circular Sequence versions of the ‘Quadrant Pattern’ is the order in which quadrant each subsequent stud tightening takes place.
For example, in the Cross Sequence, the second, third, and fourth bolts that are tightened are 180º, 90º, and 270º, respectively, from the first stud. In the Circular Sequence, the second, third, and fourth bolts that are tightened are 90º, 180º, and 270º, respectively, from the first stud. It is a common opinion of those assembling flanges in the field that the Circular Sequence version of the Quadrant Pattern is the simpler of the two options of this method.
Circular Pattern
The ‘Circular Pattern’ in PCC-1 Appendix F-6.1.3 is the next alternative method. This method only utilizes four bolts of each quadrant, separated 90° apart, while maintaining incremental torque increases around the flange. Once the final target torque value has been achieved, continuous circular passes are done until all the nuts are tight. Doing this reduces the tool movement during a bolted flanged joint assembly, saving time, energy, and money. This is mainly used in hard gasket applications but has been successful with the right precautions in soft gasket applications.Multi-Tool Methods
Now that the first three alternative flange assembly methods have been discussed, it is important to explore the last two. Both methods differ from the rest due to their simultaneous use of multiple tools while tightening the flange. Modified Star Pattern with Multiple Tools (PCC-1 Appendix F-6.1.1.2.2) and Circular Pattern with Multiple Tools (PCC-1 Appendix F-6.1.3.3) are two methods that will stand out from the rest. These methods are typically used for larger flanges with the help of hydraulic or pneumatic tools.Modified Star Pattern with Multiple Tools
When using the ‘Modified Star Pattern with Multiple Tools’, at least four tools are needed, which must be placed such that there is one tool per quadrant. If the project is time-sensitive, more than four tools can be used, but ensure they are spread evenly in even-numbered groups. Once the tools are in place, mark the flange into groups, where the same number is spread 90° from each other at four corners. Split these groups in half as evenly as possible until all bolt positions are marked. Begin by torquing a quarter of the bolts to 50% of the target. Once this has been achieved, tighten the remaining bolts to 100%. Like the rest of the patterns, end with completing circular passes with all four (or more) tools simultaneously until there is no nut rotation.The Circular Pattern with Multiple Tools
The ‘Circular Pattern with Multiple Tools’ can be used if four or more tools are unavailable. This pattern only requires two tools to be used simultaneously, but like the ‘Modified Star Pattern with Multiple Tools’, more tools can be used with the same guidelines. Start the ‘Circular Pattern with Multiple Tools’ sequence by tightening two bolts that are 180° apart to 20-30% of the final target torque value. Then, rotate the tools to bolts that are 90° apart from the previously tightened bolts. Repeat this process for 50-70% and 100% of the targeted torque values, followed by circular passes at 100% of the final target torque until no nut rotation occurs. Both methods are highly efficient in saving time and manpower and are sometimes mandatory to get an effective seal on very large flanges.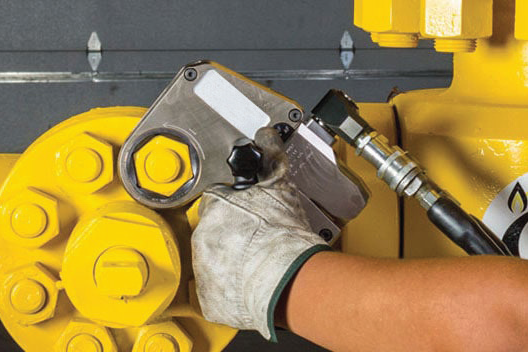
Things to Consider
On a cautionary note, the application of the aforementioned patterns must be done very accurately for RTJs or lens-type gaskets. These styles of gaskets are susceptible to axial movement and flange misalignment. Additional passes might be required when performing these sequences for these gasket styles to seat correctly. When choosing any of these methods, aim to seat the gasket to the flange as flush as possible without pinching or damaging it.One cause of uneven gasket compression can result from crosstalk. Crosstalk is a term often used when explaining the interaction between bolts as one applies stress to them. Like squeezing a balloon, crosstalk occurs when downward pressure is applied on one side of the flange, and upward pressure is applied on the opposite side. Due to the interaction of stress between the bolts, crosstalk is the reason for tightening flanges in a systematic manner. Applying the previously referenced patterns while slowly increasing the bolt stress in defined steps will eliminate the effect of crosstalk. That is why it is so essential to use incremental torque percentages while torquing around the flange. If the first pass successfully seats the gasket flush with the face of the flange, one can go around the flange an infinite number of times in small increments and achieve an optimal seal.
Final Thoughts
Time is money, and companies are experimenting with each method to see which will make them the most efficient, profitable, and, most importantly, effective. Proper precautions and considerations should be applied to each method when determining which is best for a particular application. Compared to the ‘Star Pattern’, these alternative flange assembly methods have allowed for the expansion of tried-and-true methods and make them suit the current needs of the industry.Teadit is involved daily with its customers, creating solutions, and solving problems concerning leaky connections and poorly performing equipment. Bad gasket choices can lead to equipment failure, but poor installation practices are the primary reasons for bolted flange connection leaks. Using the right materials, such as proper gasketing, thread lubricant, and bolts will only provide partial flange reliability. To have the most flange reliability, not only do the correct materials need to be specified, but they need to be installed and assembled correctly. Proper flange assembly will help minimize downtime and ensure leak-free flanges.
 About the Author
Brad Allen is a Technical Sales Rep for Teadit – North America, supporting End-Users in the Houston, Texas area. Brad has over 12 years of experience in the gasket business, ranging from the production of gaskets to on-site technical support and sales. He specializes in field support and engineered application solutions for maintenance and turnaround groups.